Setting up a feather banner doesn’t have to be complicated. With just a few steps, you can get it ready in no time. Whether you’re preparing for an event or promoting your business, knowing how to assemble a feather banner ensures it stands tall and grabs attention wherever you place it.
Step 1: Prepare the Components for Your Feather Flag
Before you dive into the flag installation process, it’s important to get everything ready. Preparing the components of your feather flag kit ensures an easy installation and helps avoid any hiccups along the way. Here’s how you can do it:
Unpack the feather flag kit
Start by opening your feather flag kit. Most kits include a custom feather flag, a ground spike, a premium fiberglass flag pole, and a travel bag. Some may also come with tools like a hammer for installation. Lay everything out on a flat surface so you can see all the parts clearly. This step helps you stay organized and makes the assembly process smoother.
Identify all parts and check for missing items
Once everything is unpacked, take a moment to identify each component. Look for items like flag pole holders, pole height extenders, and feather flag bases. Some kits may also include banner stands or table-top display easels. Cross-check these parts with the instructions provided in your kit. If anything is missing, it’s better to know now rather than halfway through the flag installation.
Inspect the components for damage
Before you proceed, inspect each part for any signs of damage. Check the poles and bases for rust or cracks. Make sure the base is sturdy and free from defects. Examine the flag itself for loose stitches or faded areas. If you notice minor issues, you can patch them up with polyester fabric or reinforce loose stitches with a needle and thread. For severe damage, consider consulting a professional to ensure your feather flag is in top shape.
By taking these steps, you’ll set yourself up for a hassle-free flag installation. A little preparation goes a long way in making sure your feather flag stands tall and looks great.
Step 2: Follow the Flag Assembly Instructions
Now that you’ve prepared your feather flag kit, it’s time to put everything together. Don’t worry—this part is straightforward if you follow the step-by-step instructions. Let’s get started!
Connect the pole sections in order
Begin by laying out the poles from your feather flag kit. You’ll notice they come in different sizes. Start with the smallest pole and connect it to the next largest one. Keep going until all the sections are securely joined. Make sure each connection is tight to avoid wobbling later. This step creates the sturdy backbone for your custom feather flag.
Insert the pole into the banner sleeve
Next, unroll your feather flag and flatten it on a clean surface. Carefully slide the assembled pole into the sleeve of the flag. Take your time to avoid snagging the fabric. Once the pole is fully inserted, check that the top of the pole reaches the curved tip of the sleeve. This ensures the flag will display its shape properly when installed.
Ensure the banner is properly aligned and secure
Before moving on to the final step, double-check the alignment of your feather flag. The fabric should sit smoothly along the pole without wrinkles or twists. If your kit includes a bungee cord, loop it over the hook at the base of the pole to pull the flag tight. This keeps the flag secure and prevents it from sagging during use.
By following these flag assembly instructions, you’ll have your feather flag ready for installation in no time. Taking a few extra moments to align and secure the banner ensures it looks professional and stands out wherever you place it.
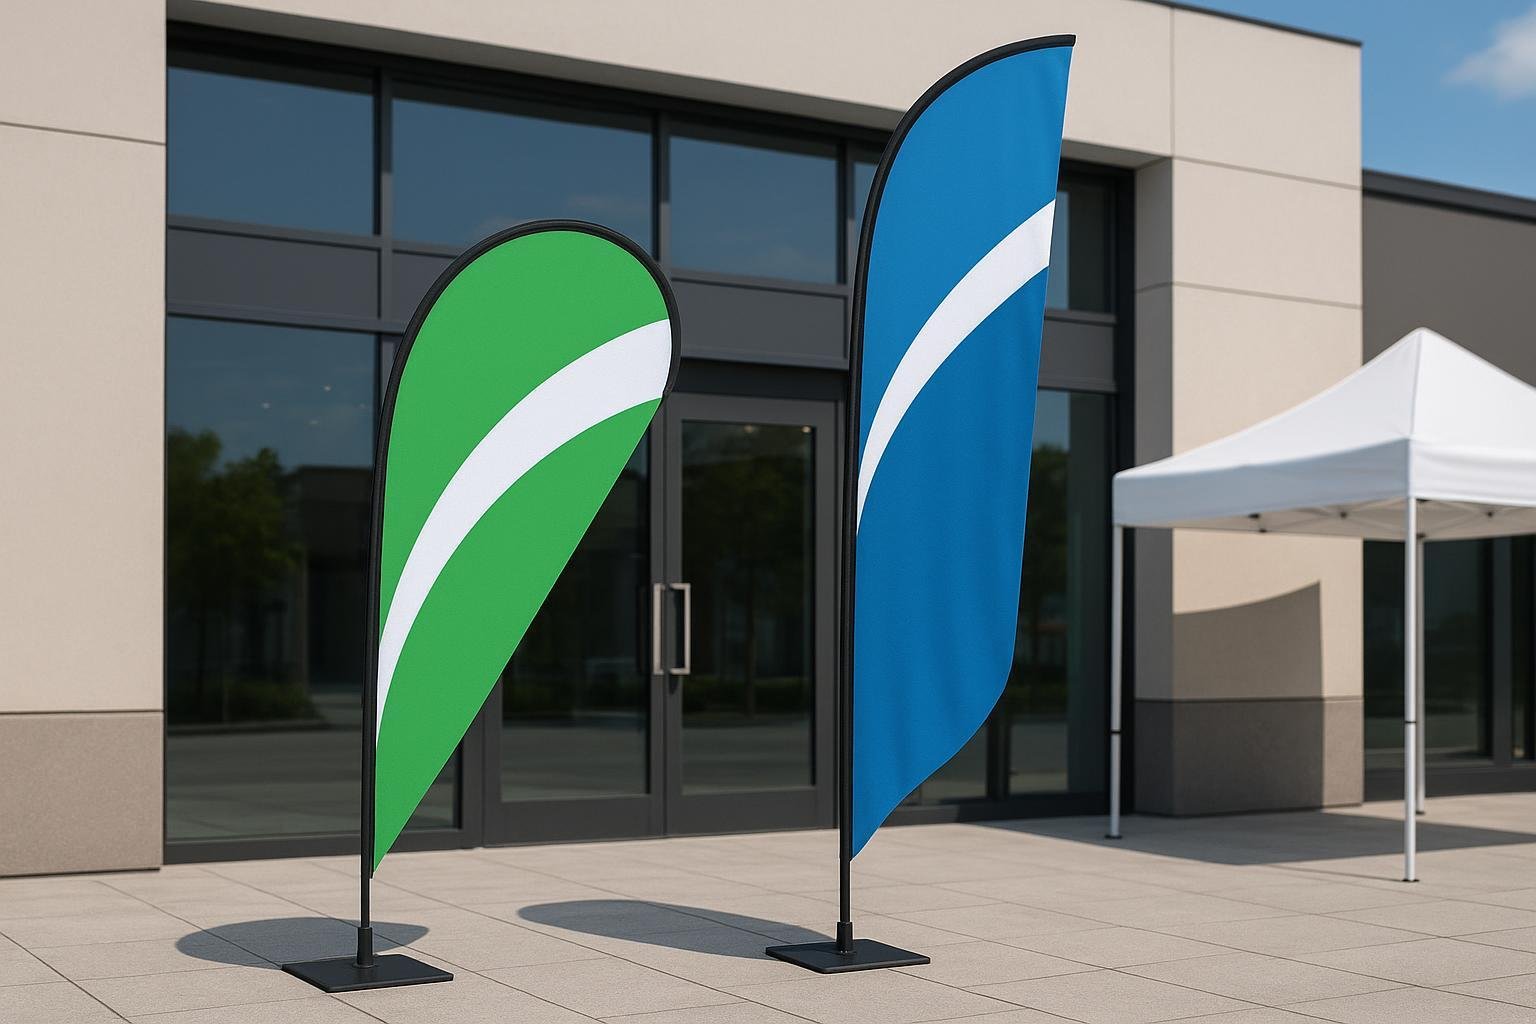
Step 3: Secure the Feather Banner in Place
Now that your custom feather flag is assembled, it’s time to secure it in place. This step ensures your feather flag stands tall and remains stable, whether indoors or outdoors. Follow these simple instructions to complete the flag installation.
Attach the pole to the base or ground spike
Start by choosing the right base for your feather flag. If you’re setting it up on soft ground like grass or dirt, a ground spike works best. It’s easy to install—just push or hammer it into the ground. For hard surfaces like pavement, a cross base or base plate is ideal. These bases often require weight bags for added stability. If you’re at an event like a car show, a car base can be secured under a vehicle’s wheel. Once you’ve selected the base, attach the pole by sliding it into the designated holder or connector. Make sure it fits snugly to prevent wobbling.
Stabilize the base for outdoor or indoor use
Stability is key, especially for outdoor installations. For soft ground, drive the ground spike deep into the soil. If you’re using a cross base or base plate, add weight bags filled with sand or water to keep it steady. Water bases are another great option—they’re pre-filled and provide excellent support for feather flags on hard ground. Indoors, a cross base or weighted base works well. Always double-check that the base is secure before moving on.
Adjust the banner’s tension and position
Finally, adjust the tension of your feather flag to ensure it looks its best. If your kit includes a bungee cord, hook it to the bottom of the pole and pull it tight. This keeps the flag taut and prevents sagging. Check the alignment of the banner one last time. The fabric should be smooth and wrinkle-free, with the design fully visible. If needed, rotate the base slightly to position the flag for maximum visibility.
By following these steps, your feather flag will be securely installed and ready to grab attention. Whether you’re using it for a business promotion or an event, a properly set up feather flag makes a strong impression.
To put together a feather banner, follow three easy steps: get the parts ready, connect the pole and flag, and secure it. This simple guide helps you set up fast and easily. Feather flags work great indoors or outdoors to catch eyes and promote your business.
To make it last longer, store your feather flag kit the right way. Keep it in a dry, clean spot and cover it to protect it. Fold the flag gently to stop wrinkles. These easy tips will keep your kit ready to use again.
Quick Tip: Always dry your flag fully before storing to prevent damage.